Image editing and the library scanner-to-Decker pipeline
Since my last post, I've been making increasingly steady progress on the Decker prototype. It's good to see, looking back, that my impulse to lean into Twine as a mapping tool paid off. Understanding the shape of the project allowed me to focus on more granular aspects of the process without losing sense of where those aspects would specifically slot into the work.
Today I'm going to outline one of these more granular workflows: actually editing and formatting the digital scans of original toy theatre sheets to prepare them for display in Decker. One of the pleasures of Decker is that it allows users to simply drag-and-drop images from their computer onto a Decker card, which handles reformatting the image to fit into the tool. However, considering Decker's constraints there's actually a few necessary steps of setup and image editing that need to happen beforehand.
Without getting too far into the weeds, the important thing to note is that Decker uses 48 discrete patterns to render all of its visual elements, including images. 16 of those patterns are reserved for specifically indexed colors. When I drag a particular image into Decker, the system attempts to "fit" the image into the closest fit for Decker's patterns and colors. (This is a dramatic oversimplification of the process, and I recommend John Earnest's "All About Color" deck for a full breakdown of the process.)

While it's technically possible to simply drag a JPEG directly from the rare book library's overhead scanner into Decker without any preliminary image editing, the results aren't very pretty. The toy theatre sheets are at least a century old and were printed from copper plates and hand colored with significant variation. Because Decker automatically indexes colors when converting them, this can create plenty of unintended effects. A delicate shift in the original's hue or shading can result in starkly digitized pixels in Decker. Adding further complexity is the issue that the original paper itself has faded and stained over the years, making it increasingly likely for Decker to interpret a white background as a yellow or brown color.
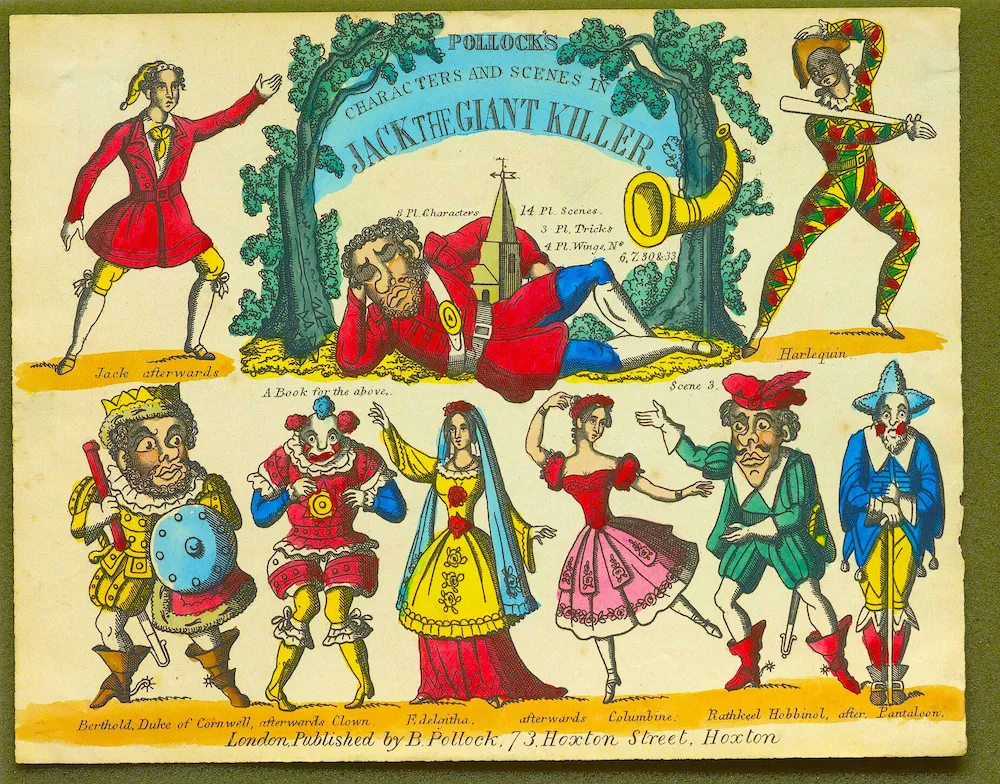
As an example, here's a JPEG of one of the toy theatre sheets pulled directly from the library scanner:
And here's what a portion of that file looks like after I've dragged it directly into Decker without any preliminary editing:
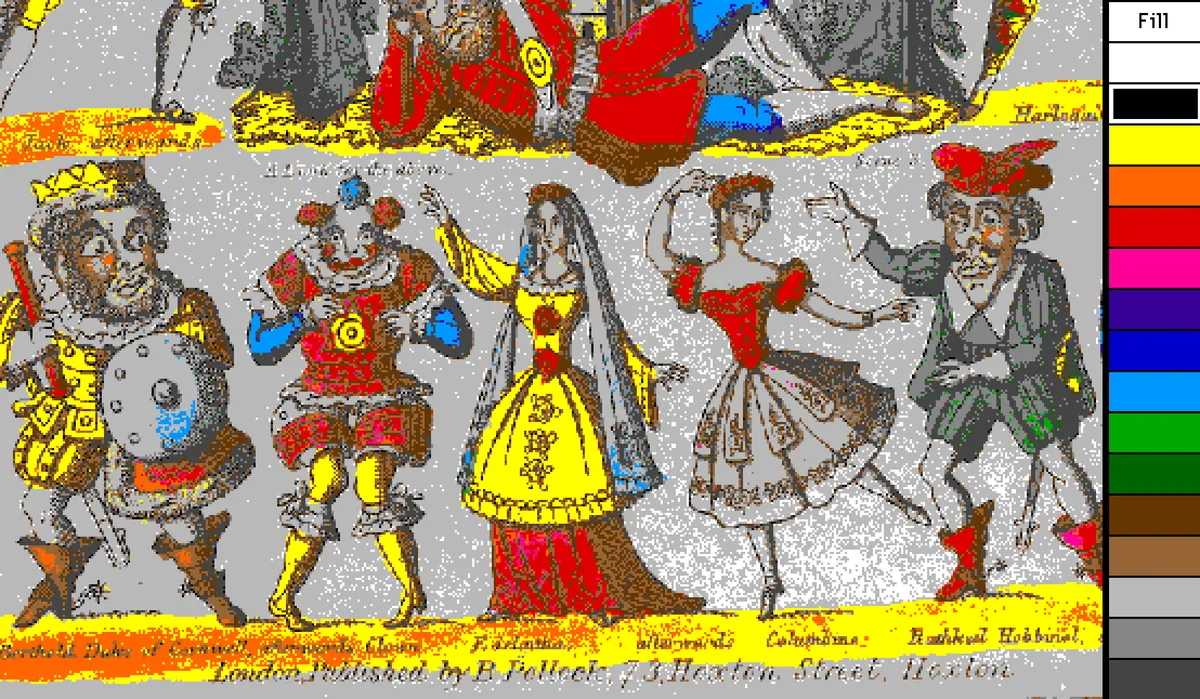
Not great! I've included Decker's color toolbar to the right, so you can see the specific index that Decker's trying to match. As you can see, it's interpreted the original background and plenty of lighter colors as grey, and only the starkest bits of red, yellow, and blue come through.
So, inserting a few steps between the scanner and Decker are clearly necessary. Here's what they look like for me, quickly summarized:
1. Using the "PalImport" Decker module, I edit Decker's system colors to more closely match those present in the toy theatre sheets. This helps reduce the chance of weird color interpretations on Decker's end. Here's a side-by-side of the changes, with the new color index on the right:


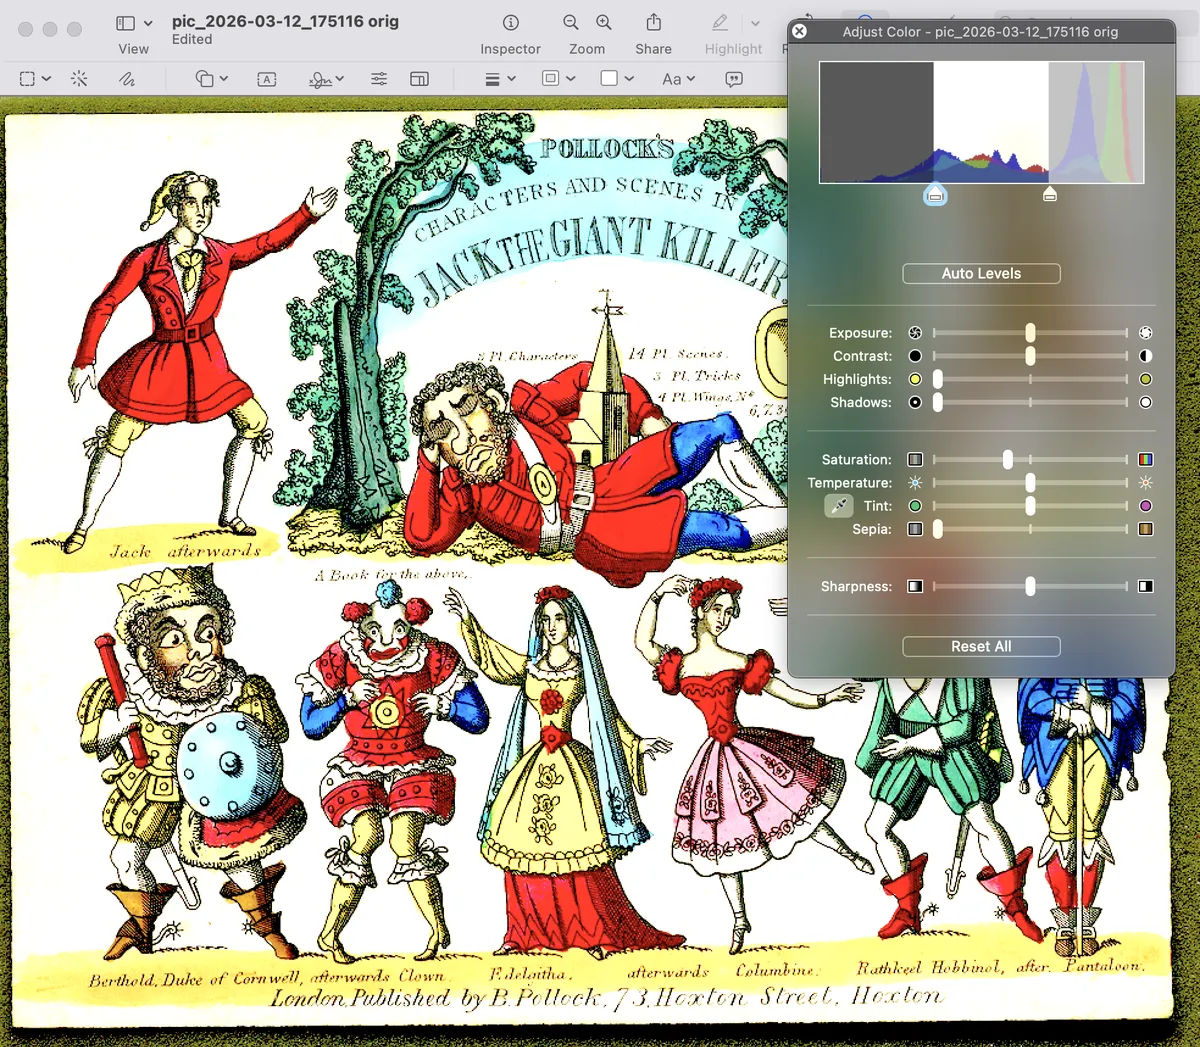
2. I open a toy theatre sheet scan in Preview on my Mac for some quick-and-dirty cropping and level adjustment. It doesn't look very pretty at this stage, but I'm intentionally washing out some of the lighter yellow colors and cranking up the saturation. This makes it easier for me to create transparent backgrounds behind the individual characters and increases the chances of Decker's color matching to differentiate colors more accurately.
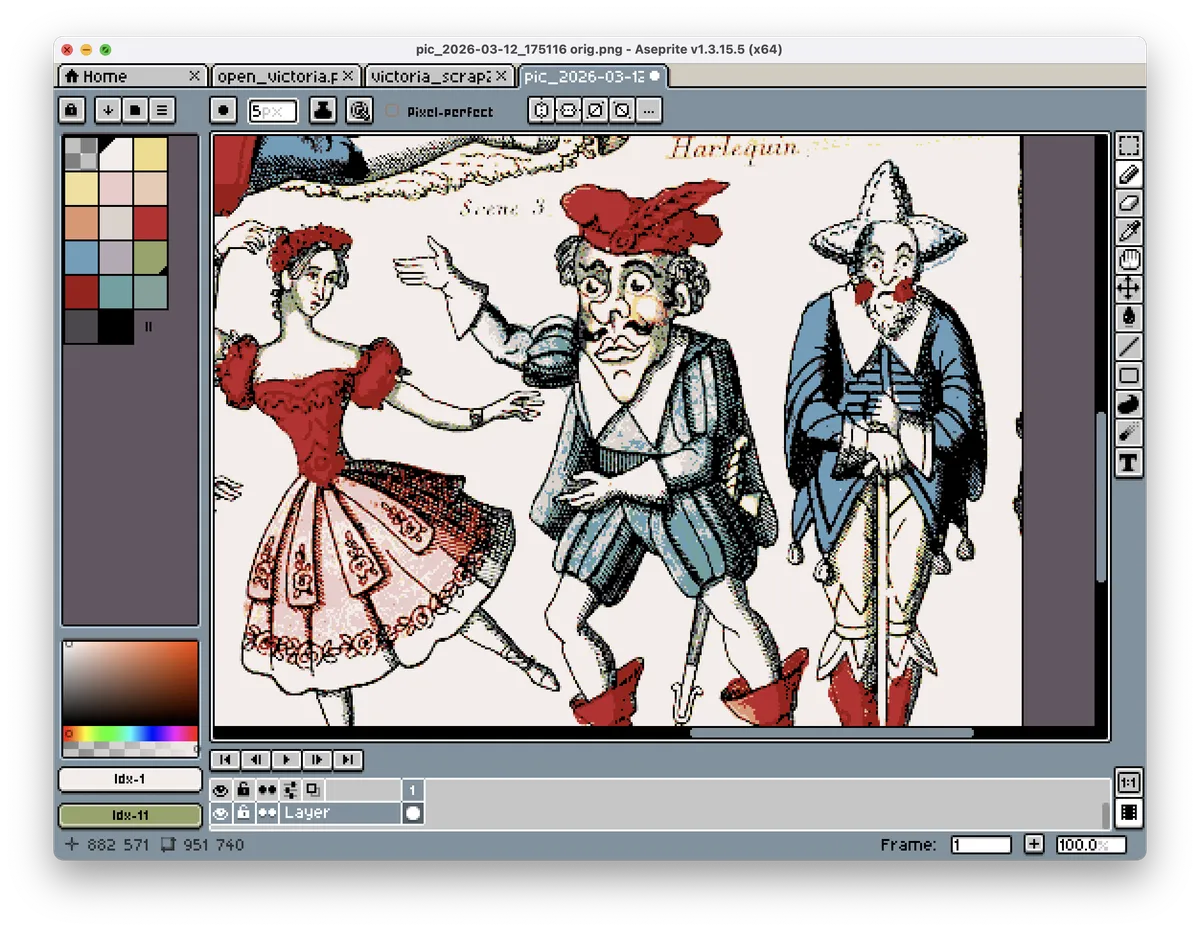
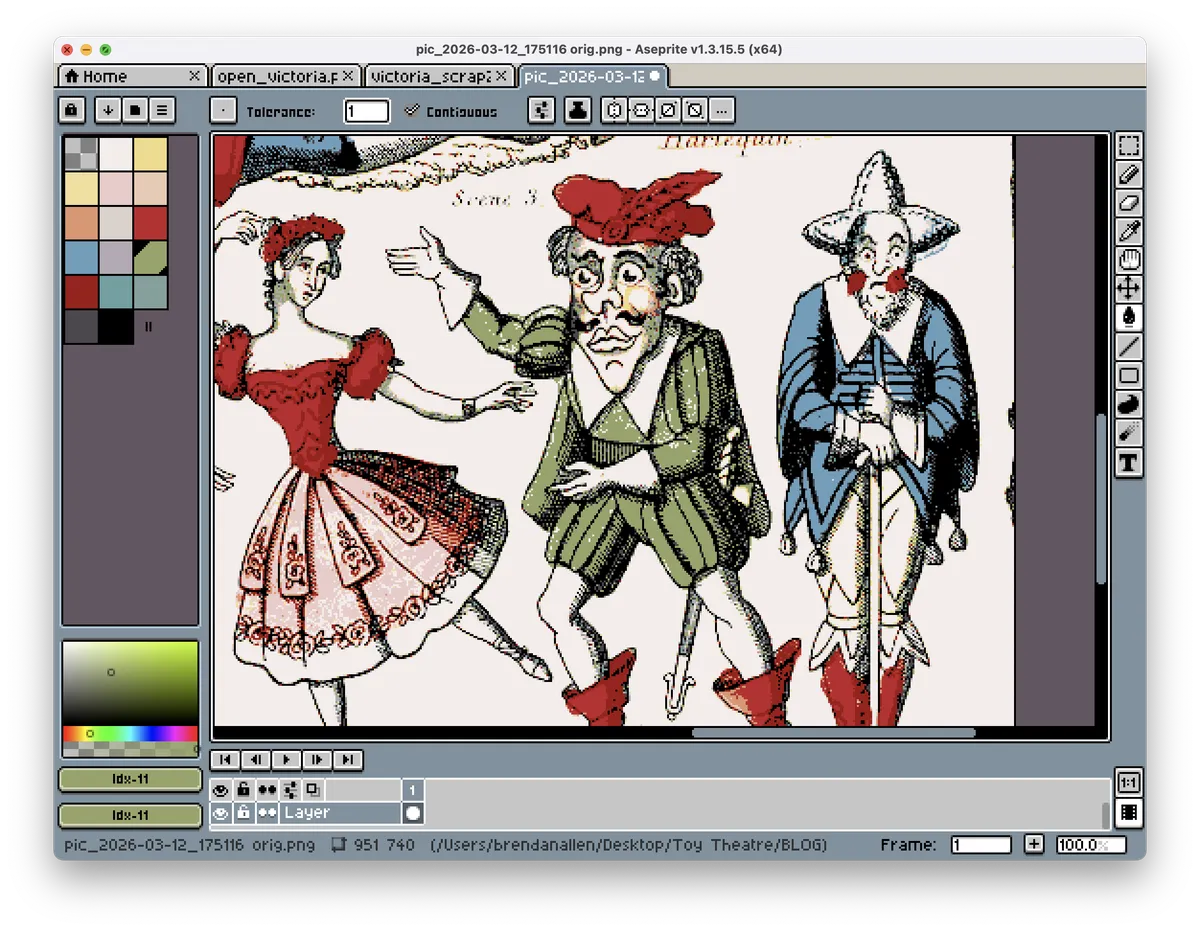
3. I then open the file in the pixel art program, Aseprite, in which I've created a color palette that matches my personalized Decker palette. This allows me to index the image's colors before dragging it into Decker as well as more easily do manual touch-ups and corrections. While I'm not previewing it here, it's also where I'll "cut out" individual characters by isolating them into respective PNG files with transparent backgrounds. As you can see here, the middle figure's lovely green garment didn't make it through the indexing perfectly, so I'll manually touch it up with the correct color. Because the image is already indexed, it's an easy process in Aseprite to simply replace the greys and blues in his garment to green without a risk of getting the color wrong. The rest of the cleanup is just a paint bucket tool, the efficacy of which is also a testament to the original print's strong line work!
 This process is quick and imprecise in some ways, as small errors will often wash out in the reduction of resolution once everything is rasterized into Decker. I try not to spend too much time chasing down stray pixels in this process.
4. Once I've exported the image as PNG, I'll then finally drag that file into Decker. Here's the result of the above process in Decker:
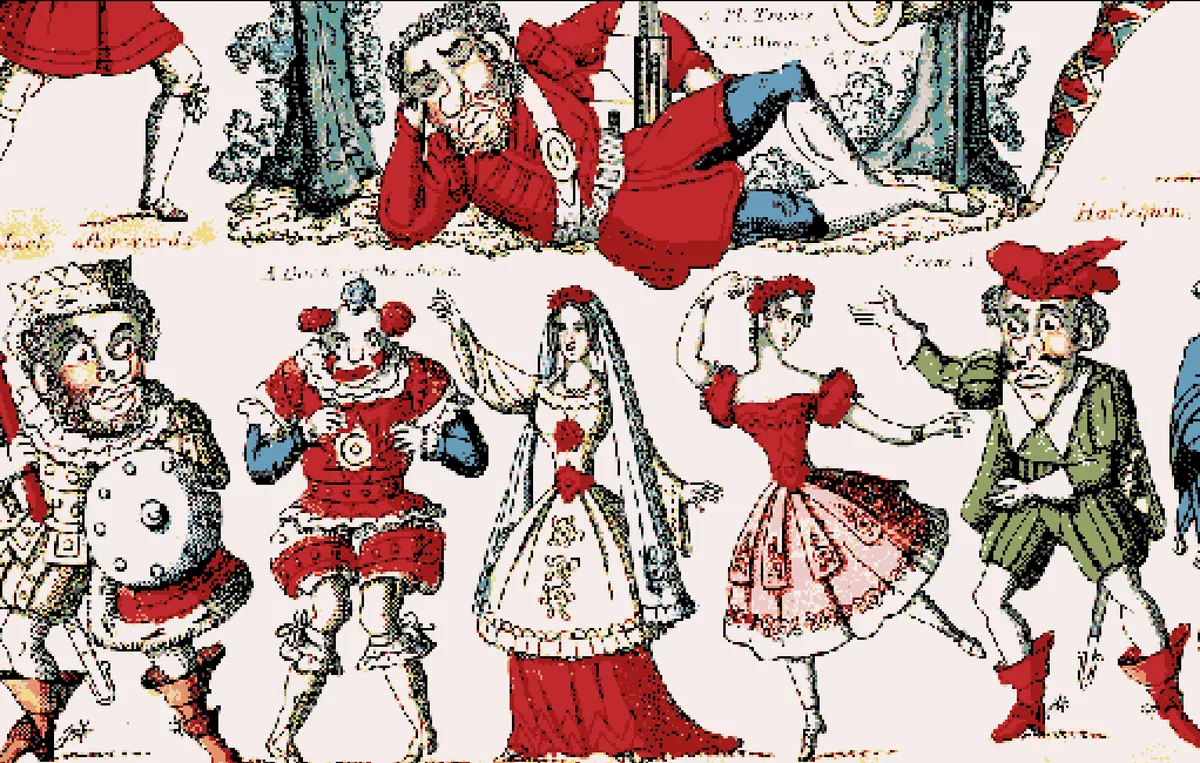 Obviously there's still some touching up to do here (the lovely blues and yellows of the middle figure's dress have washed out), but what we have is an image that's much more workable within Decker as a whole!
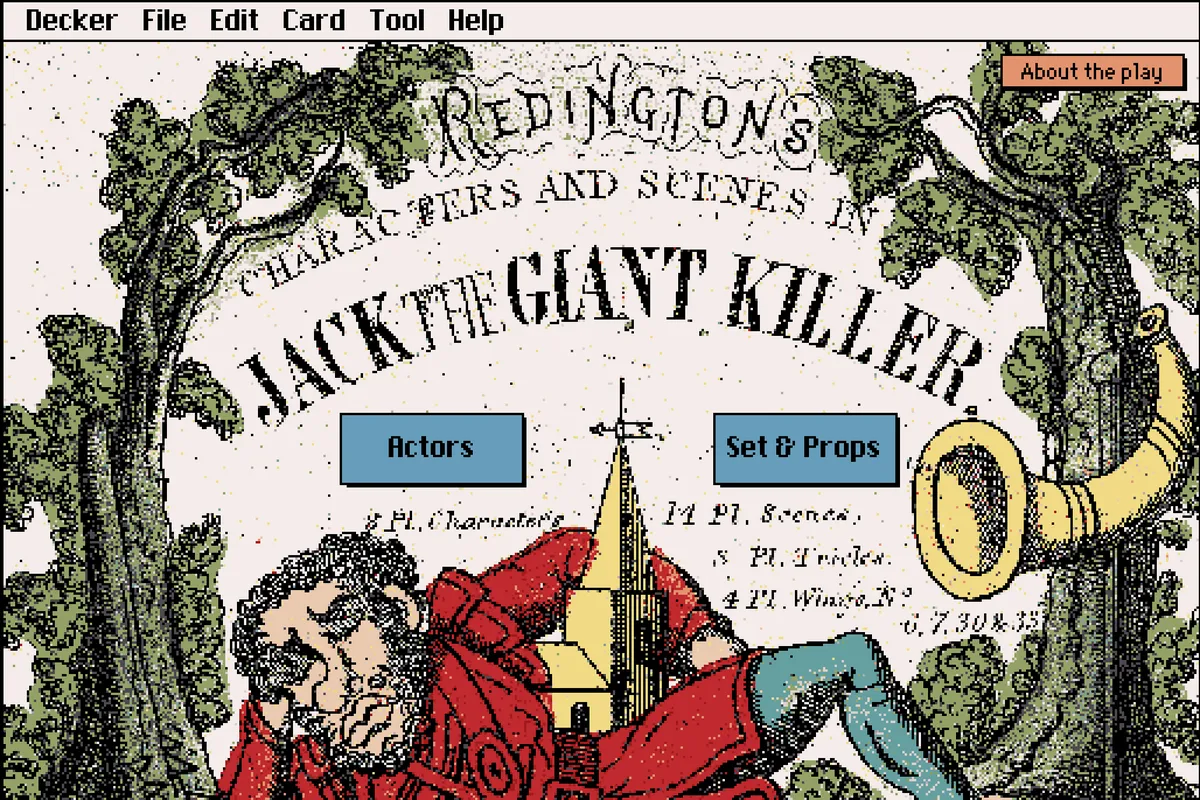
After this point, I'll often bop in and out of Decker, Aseprite, and Preview as needed to tweak things. But it's at the point where I can start integrating the image with some Decker functionality, such as this splash page for the Jack the Giant Killer play:
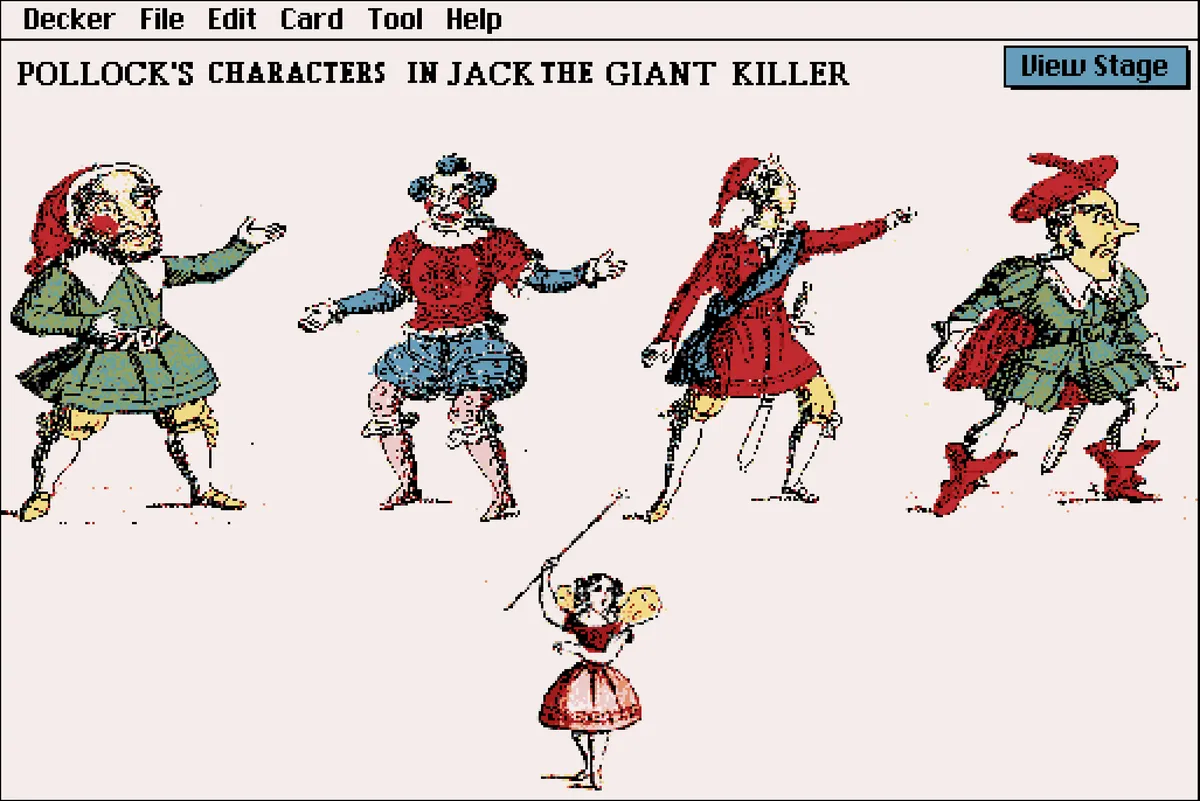
Or this very unfinished character selection card:
I'm sure that there's plenty of ways I might further tweak this process (and likely will), but it's a relief to have finally reached a defined and replicable workflow for this process.